MobileXfiles.com
  Smartphones > ZTE > ZTE Axon 40 SE

Firmware ZTE Axon 40 SE


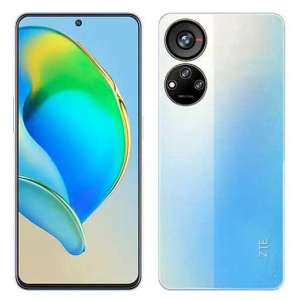
 Specification ZTE Axon 40 SE 
 Unlock ZTE Axon 40 SE 
 Root ZTE Axon 40 SE 
 Developer Mode ZTE Axon 40 SE 
 Bypass Lock Screen ZTE Axon 40 SE 
 ZTE Axon 40 SE Factory Reset 
 Bypass FRP ZTE Axon 40 SE 
 Secret codes ZTE Axon 40 SE 
 Screenshot ZTE Axon 40 SE 
 Compare ZTE Axon 40 SE 

ZTE Axon 40 SE


OS: Android 12, MyOS 12

CPU: Octa-core (2x2.0 GHz Cortex-A75 & 6x2.0 GHz Cortex-A55)
RAM: 128GB 4GB RAM
Display: 6.67 inches, 107.4 cm2 (~86.7% screen-to-body ratio)
Camera: 50 MP, f/1.8, 26mm (wide), PDAF
5 MP, f/2.4, (macro)
2 MP, f/2.4, (depth)
Battery: Li-Ion 4500 mAh, non-removable


Before flashing, you need
Create a full backup of the firmware.
The battery must be 100% charged.

1. Flashing your phone using CWM Recovery
2. Flashing the phone using TWRP Recovery
3. Flashing the phone using Fastboot

1. Phone flashing using CWM Recovery
The rich functionality of CWM Recovery www.clockworkmod.com allows you to perform many manipulations with the device, including rolling the firmware. By default, stock Recovery is installed in the devices, which means that first you need to install the ClockWorkMod Recovery utility itself.
The general firmware process described below is for ZIP files. Instructions: - Download the firmware and place it on your phone's SD card.
- Next, turn off your phone.
- Depending on the phone manufacturer, press a specific combination of buttons on the phone body. A universal option is to try pressing the following keys.
- Press the Power + Volume up (or Volume Down) (+Home) keys together for a few seconds.
- As a result, the phone will boot into Recovery mode.
- Use the volume buttons to navigate through the menus and press the Power button to make a selection.
- Then select 'Wipe data / factory reset' from the menu.
- From the Recovery mode menu, select 'Yes - delete all user data'.
- From the Recovery mode menu, select 'Wipe cashe partition'.
- From the menu select 'Yes - Wipe cache' .
- Next select 'advanced' in the menu.
- From the menu select 'Wipe Dalvik Cache'.
- Select 'Yes - Wipe Dalvik Cache' and confirm with the Power button.
Go back, press 'Go Back'.
- Next in the menu, select 'mounts and storage' .
- Then select 'format / system' from the menu.
- Select 'Yes - Format' and confirm your choice with the Power button.
Go back, press 'Go Back'.
- Highlight 'install zip from sdcard' .
- Then select 'choose zip from sdcard' from the menu.
- Select 'Yes - Install your firmware name' and confirm your choice with the Power button.
- Now from the Recovery mode menu select 'Reboot system now' .

2. Flashing the phone using TWRP Recovery
For those who prefer working with the utility in the form of TWRP Recovery, the following instructions for the step-by-step installation of the update in the form of a ZIP archive are offered:
- Upload the file with the firmware image to the SD card of your phone.
- Go to TWRP recovery. This is done in the same way as with CWM.
- Perform a factory reset. When cleaning the phone is finished, return to the original menu by pressing the 'Back' key.
- In the main menu, select 'Install' and find the previously downloaded firmware image. Click on it by dragging the slider to the side.
- After that, the firmware process will start. This will take about 2-3 minutes.
- After completion, you must click on the 'Reboot System' item, and reboot the device.

3. Flashing the phone using Fastboot
A universal tool for flashing Android smartphones using a PC is the Fastboot utility. It is part of the SDK Platform Tools, which means it is suitable for a large number of devices.
Before starting the firmware, you need to get access to the system kernel. Very often, many manufacturers block this system parameter, not wanting users to change the system files of their firmware images with their own hands. To do this, you need to unblock Bootloader. To do this, you need to study the detailed instructions for configuring and managing the command line. Before starting the firmware using a computer, do not forget to enable USB debugging of the device in the engineering settings of the device.
- Copy the archive with the firmware image to the folder with 'ADB'
- Put your smartphone in fastboot mode and write the prompt in the command line: fastbooflash zip filename.zip, where filename.zip is the name of your firmware.
- Wait for the end of the installation and reboot the device.


User questions and comments about firmware ZTE Axon 40 SE


Post your question or comment