MobileXfiles.com
  Smartphones > Asus > Asus ZenPad 3 8.0 (Z581K)

Take screenshot on Asus ZenPad 3 8.0 (Z581K)


 Specification Asus ZenPad 3 8.0 (Z581K) 
 Secret codes Asus ZenPad 3 8.0 (Z581K) 
 Bypass FRP Asus ZenPad 3 8.0 (Z581K) 
 Unlock Asus ZenPad 3 8.0 (Z581K) 
 Root Asus ZenPad 3 8.0 (Z581K) 
 Firmware Asus ZenPad 3 8.0 (Z581K) 
 Developer Mode Asus ZenPad 3 8.0 (Z581K) 
 Bypass Lock Screen Asus ZenPad 3 8.0 (Z581K) 
 Asus ZenPad 3 8.0 (Z581K) Factory Reset 
 Compare Asus ZenPad 3 8.0 (Z581K) 

Asus ZenPad 3 8.0 (Z581K)


OS: Android 6.0 (Marshmallow)

RAM: 4 GB
Display: 7.9 inches
Camera: 8 MP


Sometimes it becomes necessary to quickly save the information that appears on the screen of your phone and without spending a lot of effort to send it to one of your friends, the best way to solve this problem is to take a screenshot from the phone screen, as a result, a photo of your screen will be saved to the phone gallery. And now you can share this photo via instant messengers or email.

How to take screenshot on Asus ZenPad 3 8.0 (Z581K)?

The easiest way to take a screenshot is to press the Volume down and Power keys at the same time for a couple of seconds.

After that, a menu for managing the screenshot will appear at the bottom of the phone screen.

To take a scrolling screenshot, click on the highlighted menu item.

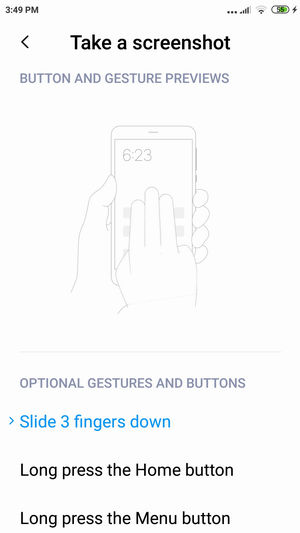
For some phone models, you can choose one of several options for how to take a screenshot on your phone.
Go to phone settings: Settings -> Additional settings - > Button and gesture shortcuts


As a result, your screenshot will be saved to the gallery.


User questions and comments about screenshot on Asus ZenPad 3 8.0 (Z581K)


Post your question or comment